Its official! PinkyCrafts has been open for business for exactly six months! It's been a wild ride, a learning experience, and such a blessing all at the same time. During my former life in corporate America, I learned the importance of staying positive and celebrating life - this is the message I wanted my shop to carry. Its only now, nine months after I left that former life behind, that I can see why my early career was so important in shaping my life. I initially felt that it was a waste, a disheartening experience that was all for nothing, and a waste of a very expensive college education. However, now I feel like I've truly found my calling: helping people celebrate the good times in life. I had to have that early career experience in order to identify and appreciate this true goal for my life. Every sale is still a thrill, and I'm so honored every time somebody selects me to help outfit their party or preserve their memories.
Now for the cold, hard facts that I know everybody is curious about. Note - in case you were wondering, all of these facts DO NOT include me; all of my data has my visits excluded from them, so all the data is for legitimate customers/visitors. Its also important to point out that no particular statistic will necessarily indicate how successful (or not) a shop may be; I'm just publishing my statistics for those new shops that may be curious, and to also document my first six months for myself!
Visits: PinkyCrafts had a total of 9,092 visits during the first six months, 2,362 of these were absolutely unique visitors. I had an average of 49.15 visits per day. 23% of of my visits were brand new visitors (this right at the average for Etsy itself), while 76.66% of my visitors were returning visitors. My visitors spent an average of 2:07 on my site.
Visitors: PinkyCrafts has been visited by shoppers all over the world - 86 countries total! Here are the top five:
1. United States (7,980 visitors)
2. Canada (351 visitors)
3. UK (107 visitors)
4. Australia (99 visitors)
5. Argentina and Brazil (tie at 34 visitors each)
Referral Sources: My top five referral sources were:
1. Direct Etsy visitors
2. Google
3. Facebook
4. Etsy Finds emails
5. Twitter
Sales: I hit my 40th sale tonight, so I officially had 40 sales in my first six months. Of those, 38 have been to US buyers, and two have been from Canadian buyers. My feedback rating stands at 100% positive, and I have 159 total shop hearts! My busiest month has been this month, September, by a wide margin. I've had 11 sales so far this month, following only two sales during the month of August. I've seen a 944% increase in profits this month over last month - woo hoo! My most popular item has ended up being my drink glass tags; I've sold 230 of them to 10 different buyers in the two months since I introduced them!
Fun Facts: I'm amazed at just how much information Google can provide about your visitors, such as 110 of my visitors were using a dial-up connection (!!); but this was only 1.21% of my visits. How about this one - 9% of my visitors have visited my site more than 200 times! And don't worry, this statistic doesn't include me; there really are people out there besides me that have been to my shop that many times!
I'm a data geek, so I hope this information was as interesting to you as it was to me. Cheers to a successful second half of this first year for PinkyCrafts!
A behind-the-scenes look at www.pinkycrafts.etsy.com - my online shop that embodies the secret of life: celebrating the good times! From unique handmade party accessories to custom and premade scrapbooks - this is where you can learn what it's like to start a business from scratch, get tips for running your own micro-business, and find insider information on sales and promotions!
Wednesday, September 29, 2010
Drum Roll Please........
Labels:
etsy sales,
etsy selling,
statistics,
stats
Thursday, September 23, 2010
Happy Fall Ya'll!
 |
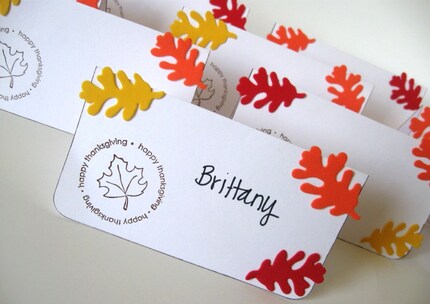
| Shades of Fall Multi-Purpose Tags, Set of 12 |
Business has been BOOMING! I had four orders come in during the two days we were moving. I started to get a little frazzled about fulfilling the orders while surrounded by boxes in my new crafting room. I haven't decided what to call that space, my craft room, my studio, my office......? Well OK, it's not just mine, but I'll spend the most amount of time in there. Before we moved in, the hubby and I discussed my space needs and our visions for my shop. We both agreed that if I want this to take off, I need to carve out serious space to do my thing. We only have a two-bedroom, but the second bedroom is rather large. I snagged our old square dining room table as my crafting table, and it fits alongside our desk (side note: why do we even have that desk anymore? We bought a wireless router, so the computer hasn't even touched the desk; it lives in the living room now!). I also agreed to share that space with hubby's video gaming stuff, and the room has a cute little indentation along the window that fits my treadmill perfectly.
My crafting space will become completely necessary in the coming weeks as I prepare for my very first craft show (eeeek!). I will be selling at the Philomath Frolic Holiday Craft Fair in just six short weeks. I live in the largest metro area in the state of Oregon, so a lot of folks ask why I picked a teeeeeeeny town in the mid-Willamette Valley for my first show, and the answer comes down to one thing: the Benjamins. The table fee for this two-day show is so ridiculously low, and I know I'll have some kinks to work out, so I want to be able to work out those kinks without worrying about making some $150-$200 table fee back. Plus, my mom lives only 30 minutes from this fair, she's itching to help out, and it's actually a pretty well-attended function in the area. I have very long to-do lists that I add to daily, and I need to really get moving on the creation of my entire holiday line. I am so beyond excited for this show!
My shop's six-month anniversary is coming up on September 29. I can't believe it all went by so quickly. My initial business plan was for the first six months; hubby and I agreed that we'd give PinkyCrafts that long before evaluating whether to keep going further. I think its safe to saw that I will be continuing in this adventure! September has been absolutely wonderful for business, following a horrible August and a dismal July. I hope to post some stats about my first six months when it comes.
Today is the first full day of fall, and my plans include crafting, crafting, and crafting to prepare for the show. Each of you should grab a pumpkin spice latte (iced or hot, your choice!) and find a pumpkin spice candle to light - I'll have one burning in every room of my house to mark the start of my favorite time of year.
Happy Fall to All!
Tuesday, September 7, 2010
How To Tuesday: Make Your Photos POP!
The Etsy forums are inundated with articles talking about the importance of taking good photos. You know you need to do it, but you're not quite sure how - until now. You don't need Photoshop or some expensive editing software to have photos worthy of the Etsy front page. Even though I have Photoshop, I use Picnik to edit all my Etsy photos, and I'm equally satisfied. In my quick tutorial, you'll learn how to use Picnik for free and improve the quality of your photos!
1. First, head on over to http://www.picnik.com/. Once the page loads (it can take awhile) and you've created a basic account (its FREE!), choose the photo you want to edit by clicking "Upload Photo".
2. Once your photo uploads, you'll be put straight into the Edit menu. From here, you can crop, rotate and spin your photo to create amazing angles, and edit the exposure of your photo. I don't recommend using the "Auto-fix" option; as you'll do a better job using the steps I'm giving you.
3. Once you've cropped and/or rotated, select "Exposure".
4. Click "Advanced" on the menu bar that pops up.
5. A small graph will appear on the right side; drag the "Highlights" bar to the right until your photo appears light enough, yet not over exposed. You can always add more highlights later; be careful not to add too much, as your photo will appear overexposed.
6. Next, drag the "Shadows" bar to the right (it usually doesn't take much) and watch the colors pop on your photo! Be careful not to overuse this; it can distort the true colors of your photograph.
7. Click "OK" when you're finished.
8. You can play around with the other edit functions - but beware of the "Sharpen" function; I learned the hard way! You can also play with the "Temperature" of your photo, making it warmer if the lighting was too cool, etc. If you don't know what these terms mean, don't worry, just play around with them and you'll understand what they do.
9. To save your photo, click on "Save and Share". If you're saving for Etsy, I change the width dimension to 1500 to ease in uploading, and leave the length; it will adjust accordingly. Then click "Save" at the bottom, and your photo will be saved to your computer. Note: if you go into your photo folders, the thumbnail that appears might be the original photo; never fear -your edits will be clear when you open the photo!
Your photos should now look much, much better! I have to edit 99% of the photos I take in some way with regards to exposure; its extremely rare for me when a photo is taken perfectly just by pointing-and-shooting, especially if you're shooting product shots. Knowing how to edit your photos allows you to shoot photos during most daylight hours, which is very helpful for me.
Here are a few before/after product shots of mine that were edited using Picnik. The first set only needed exposure correction; the second set used the "Rotate" feature plus exposure correction. The "after" shots in both are my first product shot for the respective listing, thanks to some editing magic!
I'd love to hear some success stories! Leave your comments below - good luck!
Labels:
etsy selling,
photography tips,
product photos
Monday, September 6, 2010
Support Courage for Kristi!
 |
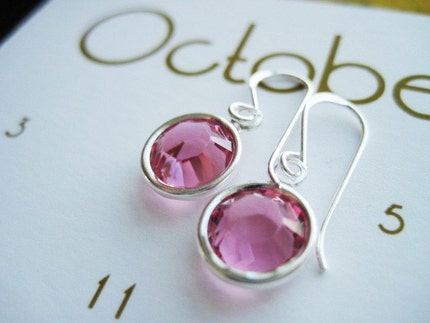
| The 2010 Kristi Earrings by JulieEllynDesigns |
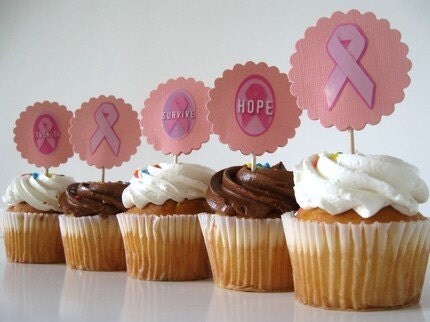
This year, our Etsy team was so touched by Kristi's story that we suggested Julie open an entire shop dedicated to raising money for Kristi's girls. CourageforKristi was born, and has already sold several items! Each item in the shop has been donated by another DTeam member. I donated a set of my special edition Breast Cancer Awareness Cupcake Toppers to the amazing selection of items.
Please take a moment and visit the shop, and help us spread the word about this wonderful fundraiser! Click any of the links in this post, or go directly to http://www.courageforkristi.etsy.com/!
 |
| Breast Cancer Awareness Cupcake Toppers by PinkyCrafts |
Thursday, September 2, 2010
Color My World
 |
| Salmon Pink & Amaranth Pink |
Labels:
color wheel,
etsy,
pink color,
pinkycrafts
Subscribe to:
Comments (Atom)


